![]()
![]()
For users who just move from Windows PC to a new Mac may want to enjoy both Windows and macOS interchangeably during the transition period. Then the built-in utility Boot Camp is a good helper to run Windows on Mac at the first place.
However, this has been changed since the boom of new Arm-based Macs are introduced recently, which involves MacBook Air, MacBook Pro, and Mac mini in 2020. Shifting from the Intel processor to Apple Silicon M1, there is no Windows support through Boot Camp on M1 Mac.
You can’t run Windows on M1 Macs using Boot Camp, at least, now.
Will this be a concern for people who just bought the M1 Mac computers without Boot Camp?
Maybe not.
“We’re not direct booting an alternate operating system. Purely virtualization is the route. These hypervisors can be very efficient, so the need to direct boot shouldn’t really be the concern.”
says Craig Federighi, Apple’s senior vice president of software engineering
That’s to say, there is a way to run Windows on M1 Macs, or at least, virtually.
For those who don’t know, a virtual machine is an emulator for a computer. That’s to say, you can create a little window on your desktop with a second desktop inside it, though usually for developer. And here, it means a Windows desktop window inside a Mac desktop.
Run Windows on ARM-based M1 Macs using Parallels
Instead of depending on Boot Camp, Parallels recently released a technical preview of Parallels 16 and it is compatible with M1 Macs with surprising performace.
Before you are too excited about finf a way to run Windows on your new M1 Macs, there are some important things you should be aware of.
- Parallels 16 requires the ARM version of Windows and it won’t work with the X86 version of Windows 10.
- Crashes and bugs occurs because it’s a multi-side work and it’s relatively new. So, do not apply this for your value workflow, or back up files if you insist.
- It only designed to work with Arm-based virtual machine setups, not the real booting Windows on M1 Macs. So, it may not be a good idea for Windows game player.
Now, let’s see how to use Parallels to use Windows on M1 Mac.
Steps to Download and install Parallels 16
Since it’s a third-party program, the first thing is to make this application installed on your Mac.
- Download and install Parallels Desktop 16 for M1 Mac Technical Preview, which will following with an activation key below the download link.
- Sign up for the Windows Insider Program, and download the Windows 10 Client ARM64 Insider Preview as required.
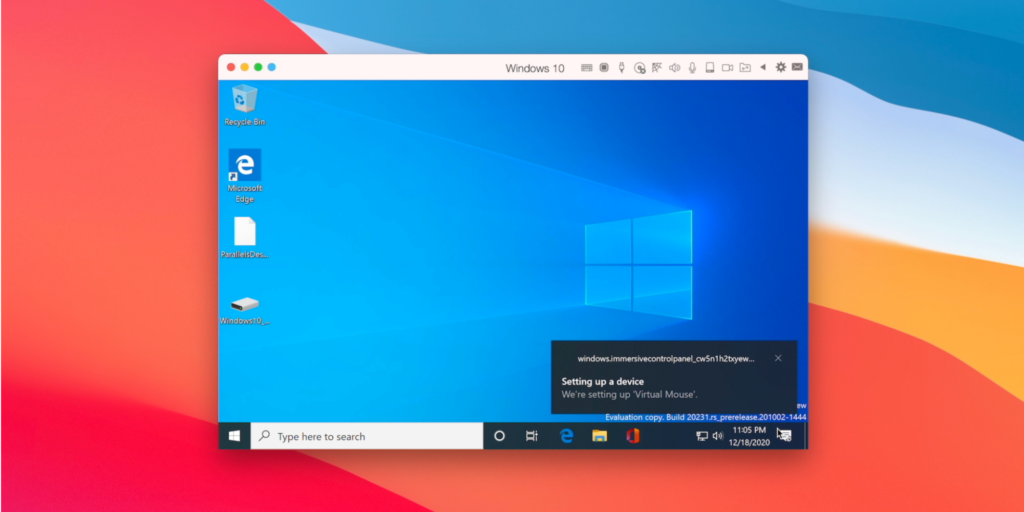
- Open Parallels on your M1 Mac and then drag the “Windows10_InsiderPreview_Client_ARM64_en-us” file to the Installation Assistant and click Create.
- Parallels 16 will create a new Windows 10 for ARM virtual machine instance and then you need to login with the user account and the activation key that you get from the first place.
- Then you can follow the on-screen instructions in Parallels 16 to install necesssary tools.
Note: In this early build of Parallels for M1 Macs, you’ll need to disable Time Sync or else you’ll have an unresponsive Windows VM.
For further issues like disable Time Sync, enable x64 emulation support, and bump up the core allocation, you’ll find more information from Jeff Benjamin’s post.
Though Virtual Machine is a way to run Windows on M1 Mac, unfortunately, some arm32 apps are not supported but crash the desktop. But at least for those native arm64 applications, it’s a relief.
Good luck if you decide to try this setup!